

MC/Serviceguard Cluster on HP-UX 11.31
HP Serviceguard is specialized software for protecting mission-critical
applications from a wide variety of hardware and software failures. With
Serviceguard, multiple servers (nodes) and/or server partitions are organized
into an enterprise cluster that delivers highly available application services
to LAN-attached clients. HP Serviceguard monitors the health of each node and
rapidly responds to failures in a way that minimizes or eliminates application
downtime.
This article describes the installation steps for a
MC/Serviceguard Cluster Installation on two HP-UX Servers.
Environment:
<!--[if gte mso 9]> Normal 0 false false false MicrosoftInternetExplorer4 <![endif]--><!--[if gte mso 9]> <![endif]--> Server 1:
Hardware: HP Integrity rx4640
OS: HP-UX B.11.31
Servername: boston.vogtnet.com
Stationary IP: 172.16.18.30 (lan0)
Heartbeat IP: 10.10.1.30 (lan1)
Standby: (lan2)
Lock Disk: VG: /dev/vglock
PV: /dev/disk/disk12
Server 2:
Hardware: HP Integrity rx4640
OS: HP-UX B.11.31
Servername: denver.vogtnet.com
Stationary IP: 172.16.18.31 (lan0)
Heartbeat IP: 10.10.1.31 (lan1)
Standby: (lan2)
Lock Disk: VG: /dev/vglock
PV: /dev/disk/disk12
Storage:
HP Enterprise Virtual Array EVA8000 SAN
<!--[if gte mso 9]> Normal 0 false false false MicrosoftInternetExplorer4 <![endif]--><!--[if gte mso 9]> <![endif]-->Cluster Installation Steps
1. Configure /etc/hosts
<!--[if gte mso 9]> Normal 0 false false false MicrosoftInternetExplorer4 <![endif]--><!--[if gte mso 9]> <![endif]-->
-> on boston.vogtnet.com:
# vi /etc/hosts
—————————————-
# boston
172.16.18.30 boston.vogtnet.com boston
10.10.1.30 boston.vogtnet.com boston
127.0.0.1 localhost loopback
# denver
172.16.18.31 denver.vogtnet.com denver
10.10.1.31 denver.vogtnet.com denver
—————————————-
-> on denver.vogtnet.com
# vi /etc/hosts
—————————————-
# denver
172.16.18.31 denver.vogtnet.com denver
10.10.1.31 denver.vogtnet.com denver
127.0.0.1 localhost loopback
# boston
172.16.18.30 boston.vogtnet.com boston
10.10.1.30 boston.vogtnet.com boston
—————————————-
<!--[if gte mso 9]> Normal 0 false false false MicrosoftInternetExplorer4 <![endif]--><!--[if gte mso 9]> <![endif]-->
2. Set $SGCONF (on both nodes)
<!--[if gte mso 9]> Normal 0 false false false
MicrosoftInternetExplorer4 <![endif]--><!--[if gte mso 9]>
<![endif]--># vi
~/.profile
—————————————-
SGCONF=/etc/cmcluster
export SGCONF
—————————————-
# echo
$SGCONF
/etc/cmcluster
<!--[if gte mso 9]> Normal 0 false false false MicrosoftInternetExplorer4 <![endif]--><!--[if gte mso 9]> <![endif]--> <!--[endif]-->
3. Configure ~/.rhosts (for rcp, don’t use in secure envs)
-> on boston.vogtnet.com
# cat ~/.rhosts
denver root
-> on denver.vogtnet.com
# cat ~/.rhosts
boston root
<!--[if gte mso 9]> Normal 0 false false false MicrosoftInternetExplorer4 <![endif]--><!--[if gte mso 9]> <![endif]--> <!--[endif]-->
4. Create the $SGCONF/cmclnodelist
<!--[if gte mso 9]> Normal 0 false false false MicrosoftInternetExplorer4 <![endif]--><!--[if gte mso 9]> <![endif]--><!--[endif]--> <!--[endif]-->
(every node in the cluster must be listed in this file)
# vi
$SGCONF/cmclnodelist
—————————————-
boston root
denver root
—————————————-
#rcp cmclnodelist
denver:/etc/cmcluster/
<!--[if gte mso 9]> Normal 0 false false false MicrosoftInternetExplorer4 <![endif]--><!--[if gte mso 9]> <![endif]--> <!--[endif]-->
5. Configure Heartbeat IP (lan1)
-> on boston.vogtnet.com
<!--[if gte mso 9]> Normal 0 false false false MicrosoftInternetExplorer4 <![endif]--><!--[if gte mso 9]> <![endif]--> <!--[endif]-->
# vi
/etc/rc.config.d/netconf
—————————————-
INTERFACE_NAME[1]=”lan1″
IP_ADDRESS[1]=”10.10.1.30″
SUBNET_MASK[1]=”255.255.255.0″
BROADCAST_ADDRESS[1]=”"
INTERFACE_STATE[1]=”"
DHCP_ENABLE[1]=0
INTERFACE_MODULES[1]=”"
—————————————-
-> on denver.vogtnet.com
<!--[if gte mso 9]> Normal 0 false false false MicrosoftInternetExplorer4 <![endif]--><!--[if gte mso 9]> <![endif]--> <!--[endif]-->
# vi
/etc/rc.config.d/netconf
—————————————-
INTERFACE_NAME[1]=”lan1″
IP_ADDRESS[1]=”10.10.1.31″
SUBNET_MASK[1]=”255.255.255.0″
BROADCAST_ADDRESS[1]=”"
INTERFACE_STATE[1]=”"
DHCP_ENABLE[1]=0
INTERFACE_MODULES[1]=”"
—————————————-
<!--[if gte mso 9]> Normal 0 false false false MicrosoftInternetExplorer4 <![endif]--><!--[if gte mso 9]> <![endif]--> <!--[endif]-->
Restart Network:
<!--[if gte mso 9]> Normal 0 false false false MicrosoftInternetExplorer4 <![endif]--><!--[if gte mso 9]> <![endif]--> <!--[endif]-->
# /sbin/init.d/net
stop
# /sbin/init.d/net
stop
# ifconfig
lan1
lan1: flags=1843<UP,BROADCAST,RUNNING,MULTICAST,CKO>
inet 10.10.1.30 netmask ffffff00 broadcast 10.10.1.255
6. Disable the Auto Activation of LVM Volume Groups (on bot nodes)
# vi
/etc/lvmrc
—————————————-
AUTO_VG_ACTIVATE=0
—————————————-
<!--[if gte mso 9]> Normal 0 false false false MicrosoftInternetExplorer4 <![endif]--><!--[if gte mso 9]> <![endif]--> <!--[endif]-->
7. Lock Disk
<!--[if gte mso 9]> Normal 0 false false false MicrosoftInternetExplorer4 <![endif]--><!--[if gte mso 9]> <![endif]--> <!--[endif]-->
( The lock disk is not dedicated for use as the cluster lock; the disk can be
employed as part of a normal volume group with user data on it. The
cluster lock volume group and physical volume names are identified in
the cluster configuration file. )
However, in this cluster we use a dedicated Lock Volume Group so we are sure this VG will never be deleted.
As soon as this VG is registered as lock disk in the cluster configuration, it will be automatically marked as cluster aware.
<!--[if gte mso 9]> Normal 0 false false false MicrosoftInternetExplorer4 <![endif]--><!--[if gte mso 9]> <![endif]--><!--[endif]--> <!--[endif]-->
Create a LUN on the EVA and present it to boston and denver.
boston.vogtnet.com:
# ioscan -N -fnC
disk
disk 12 64000/0xfa00/0×7 esdisk CLAIMED DEVICE HP HSV210
/dev/disk/disk12 /dev/rdisk/disk12
# mkdir
/dev/vglock
# mknod /dev/vglock/group
c 64 0x010000
# ll
/dev/vglock
crw-r–r– 1 root sys 64 0×010000 Jul 31 14:42 group
# pvcreate -f
/dev/rdisk/disk12
Physical volume “/dev/rdisk/disk12″ has been successfully created.
// Create the VG with the HP-UX 11.31 agile Multipathing instead of LVM Alternate Paths.
# vgcreate /dev/vglock
/dev/disk/disk12
Volume group “/dev/vglock” has been successfully created.
Volume Group configuration for /dev/vglock has been saved in /etc/lvmconf/vglock.conf
# strings
/etc/lvmtab
/dev/vglock
/dev/disk/disk12
# vgexport -v -p -s -m
vglock.map /dev/vglock
# rcp vglock.map
denver:/
denver.vogtnet.com:
# mkdir
/dev/vglock
# mknod /dev/vglock/group
c 64 0x010000
# vgimport -v -s -m
vglock.map vglock
–> Agile Multipathing of HP-UX 11.31 is not used by default after import (HP-UX 11.31 Bug ?!). The volume group uses alternate LVM Paths.
Solution:
# vgchange -a y
vglock
// Remove Alternate Paths
# vgreduce vglock
/dev/dsk/c16t0d1 /dev/dsk/c14t0d1 /dev/dsk/c18t0d1 /dev/dsk/c12t0d1
/dev/dsk/c8t0d1 /dev/dsk/c10t0d1 /dev/dsk/c6t0d1
// Add agile Path
# vgextend /dev/vglock
/dev/disk/disk12
// Remove Primary Path
# vgreduce vglock
/dev/dsk/c4t0d1
Device file path “/dev/dsk/c4t0d1″ is an primary link.
Removing primary link and switching to an alternate link.
Volume group “vglock” has been successfully reduced.
Volume Group configuration for /dev/vglock has been saved in /etc/lvmconf/vglock.conf
# strings
/etc/lvmtab
/dev/vglock
/dev/disk/disk12
# vgchange -a n vglock
// Backup VG
# vgchange -a r
vglock
# vgcfgbackup
/dev/vglock
Volume Group configuration for /dev/vglock has been saved in /etc/lvmconf/vglock.conf
# vgchange -a n
vglock
<!--[if gte mso 9]> Normal 0 false false false MicrosoftInternetExplorer4 <![endif]--><!--[if gte mso 9]> <![endif]-->
8. Create Cluster Config (on boston.vogtnet.com)
<!--[if gte mso 9]> Normal 0 false false false MicrosoftInternetExplorer4 <![endif]--><!--[if gte mso 9]> <![endif]--><!--[endif]--> <!--[endif]-->
# cmquerycl -v -C
/etc/cmcluster/cmclconfig.ascii -n boston -n denver
# cd
$SGCONF
# cat cmclconfig.ascii |
grep -v "^#"
——————————————————————-
CLUSTER_NAME cluster1
FIRST_CLUSTER_LOCK_VG /dev/vglock
NODE_NAME denver
NETWORK_INTERFACE lan0
HEARTBEAT_IP 172.16.18.31
NETWORK_INTERFACE lan2
NETWORK_INTERFACE lan1
STATIONARY_IP 10.10.1.31
FIRST_CLUSTER_LOCK_PV /dev/dsk/c16t0d1
NODE_NAME boston
NETWORK_INTERFACE lan0
HEARTBEAT_IP 172.16.18.30
NETWORK_INTERFACE lan2
NETWORK_INTERFACE lan1
STATIONARY_IP 10.10.1.30
FIRST_CLUSTER_LOCK_PV /dev/disk/disk12
HEARTBEAT_INTERVAL 1000000
NODE_TIMEOUT 2000000
AUTO_START_TIMEOUT 600000000
NETWORK_POLLING_INTERVAL 2000000
NETWORK_FAILURE_DETECTION INOUT
MAX_CONFIGURED_PACKAGES 150
VOLUME_GROUP /dev/vglock
———————————————————————————–
-> Change this file to:
———————————————————————————–
CLUSTER_NAME MCSG_SAP_Cluster
FIRST_CLUSTER_LOCK_VG /dev/vglock
NODE_NAME denver
NETWORK_INTERFACE lan0
STATIONARY_IP 172.16.18.31
NETWORK_INTERFACE lan2
NETWORK_INTERFACE lan1
HEARTBEAT_IP 10.10.1.31
FIRST_CLUSTER_LOCK_PV /dev/disk/disk12
NODE_NAME boston
NETWORK_INTERFACE lan0
STATIONARY_IP 172.16.18.30
NETWORK_INTERFACE lan2
NETWORK_INTERFACE lan1
HEARTBEAT_IP 10.10.1.30
FIRST_CLUSTER_LOCK_PV /dev/disk/disk12
HEARTBEAT_INTERVAL 1000000
NODE_TIMEOUT 5000000
AUTO_START_TIMEOUT 600000000
NETWORK_POLLING_INTERVAL 2000000
NETWORK_FAILURE_DETECTION INOUT
MAX_CONFIGURED_PACKAGES 15
VOLUME_GROUP /dev/vglock
———————————————————————————–
# cmcheckconf -v -C cmclconfig.ascii
Checking cluster file: cmclconfig.ascii
Checking nodes … Done
Checking existing configuration … Done
Gathering storage information
Found 2 devices on node denver
Found 2 devices on node boston
Analysis of 4 devices should take approximately 1 seconds
0%—-10%—-20%—-30%—-40%—-50%—-60%—-70%—-80%—-90%—-100%
Found 2 volume groups on node denver
Found 2 volume groups on node boston
Analysis of 4 volume groups should take approximately 1 seconds
0%—-10%—-20%—-30%—-40%—-50%—-60%—-70%—-80%—-90%—-100%
Gathering network information
Beginning network probing (this may take a while)
Completed network probing
Checking for inconsistencies
Adding node denver to cluster MCSG_SAP_Cluster
Adding node boston to cluster MCSG_SAP_Cluster
cmcheckconf: Verification completed with no errors found.
Use the cmapplyconf command to apply the configuration.
# cmapplyconf -v -C
cmclconfig.ascii
Checking cluster file: cmclconfig.ascii
Checking nodes … Done
Checking existing configuration … Done
Gathering storage information
Found 2 devices on node denver
Found 2 devices on node boston
Analysis of 4 devices should take approximately 1 seconds
0%—-10%—-20%—-30%—-40%—-50%—-60%—-70%—-80%—-90%—-100%
Found 2 volume groups on node denver
Found 2 volume groups on node boston
Analysis of 4 volume groups should take approximately 1 seconds
0%—-10%—-20%—-30%—-40%—-50%—-60%—-70%—-80%—-90%—-100%
Gathering network information
Beginning network probing (this may take a while)
Completed network probing
Checking for inconsistencies
Adding node denver to cluster MCSG_SAP_Cluster
Adding node boston to cluster MCSG_SAP_Cluster
Marking/unmarking volume groups for use in the cluster
Completed the cluster creation
// Deactivate the VG (vglock will be activated from cluster daemon)
# vgchange -a n
/dev/vglock
9. Start the Cluster (on boston.vogtnet.com)
<!--[if gte mso 9]> Normal 0 false false false MicrosoftInternetExplorer4 <![endif]--><!--[if gte mso 9]> <![endif]--><!--[endif]--> <!--[endif]-->
# cmruncl
-v
cmruncl: Validating network configuration…
cmruncl: Network validation complete
Waiting for cluster to form ….. done
Cluster successfully formed.
Check the syslog files on all nodes in the cluster to verify that no warnings occurred during startup.
# cmviecl
-v
MCSG_SAP_Cluster up
NODE STATUS STATE
denver up running
Cluster_Lock_LVM:
VOLUME_GROUP PHYSICAL_VOLUME STATUS
/dev/vglock /dev/disk/disk12 up
Network_Parameters:
INTERFACE STATUS PATH NAME
PRIMARY up 0/2/1/0 lan0
PRIMARY up 0/2/1/1 lan1
STANDBY up 0/3/2/0 lan2
NODE STATUS STATE
boston up running
Cluster_Lock_LVM:
VOLUME_GROUP PHYSICAL_VOLUME STATUS
/dev/vglock /dev/disk/disk12 up
Network_Parameters:
INTERFACE STATUS PATH NAME
PRIMARY up 0/2/1/0 lan0
PRIMARY up 0/2/1/1 lan1
STANDBY up 0/3/2/0 lan2
<!--[if gte mso 9]> Normal 0 false false false MicrosoftInternetExplorer4 <![endif]--><!--[if gte mso 9]> <![endif]--> <!--[endif]-->
10. Cluster Startup
Shutdown
// Automatic Startup:
/etc/rc.config.d/cmcluster
AUTOSTART_CMCLD=1
// Manuel Startup
# cmruncl -v
// Overview
# cmviewcl
-v
// Stop Cluster
<!--[if gte mso 9]> Normal 0 false false false
MicrosoftInternetExplorer4 <![endif]--><!--[if gte mso 9]>
<![endif]--> # cmhaltcl
-v
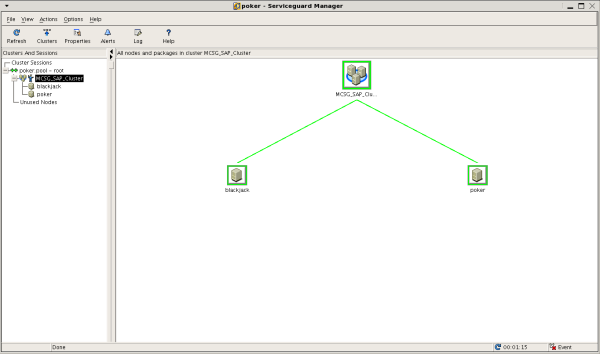
Serviceguard Manager (sgmgr)
Serviceguard Manager is a graphical user interface that
provides configuration, monitoring, and administration of Serviceguard.
Serviceguard Manager can be installed on HP‑UX, Red Hat Linux, Novell SUSE
Linux, Novell Linux Desktop or Microsoft Windows.
More Information:
http://h71028.www7.hp.com/enterprise/cache/4174-0-0-0-121.html?jumpid=reg_R1002_USEN
<!--[if gte mso 9]> Normal 0 false false false
MicrosoftInternetExplorer4 <![endif]--><!--[if gte mso 9]>
<![endif]-->
<!--[endif]-->
출처
http://thomasvogt.wordpress.com/2008/08/26/mcserviceguard-cluster-installation-on-hp-ux-1131/
'Linux & Unix > MC/ServiceGuard' 카테고리의 다른 글
| HP MC Service Guard install (0) | 2012.05.10 |
|---|---|
| Module 5 - Configure a Cluster (0) | 2012.05.10 |
| MC / Service Guard 명령어 (0) | 2012.05.10 |